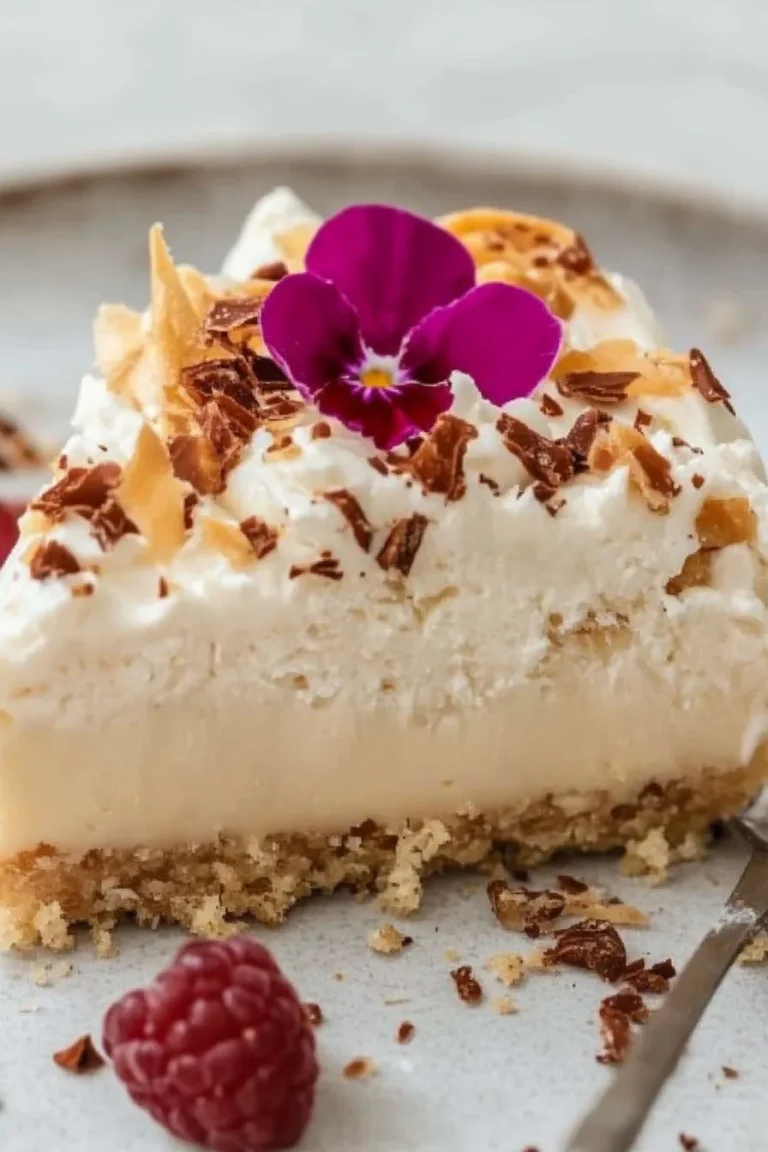
Easy Gluten-Free Hawaiian Dream Cake is a delightful dessert that is guaranteed to impress. This cake is perfect for any occasion, from birthdays to casual get-togethers, and it truly encapsulates the essence of tropical flavors. With its layers of rich taste and colorful presentation, this cake is sure to bring a smile to anyone’s face. Each bite delivers a burst of flavors reminiscent of Hawaii, making it the ideal treat for those with gluten sensitivities and for anyone else who loves cake!
From the first taste, you’ll be enamored by its moist layers, creamy frosting, and hints of pineapple and coconut. It’s the kind of dessert that sparks joy and transports you to a sunny beach, even on a chilly day. Whether you are treating yourself or impressing your friends and loved ones, Easy Gluten-Free Hawaiian Dream Cake is a must-try recipe. In this article, you’ll discover the secrets to making this incredible cake, its preparation details, and how to serve it like a pro. So, let’s dive into the wonderful world of this tropical delight!
Why You’ll Love This Recipe
There are many reasons why you will fall in love with Easy Gluten-Free Hawaiian Dream Cake:
1. Tropical Flavors – This cake features scrumptious combinations of pineapple and coconut, evoking a refreshing island vibe.
2. Gluten-Free Option – Not only is this cake scrumptious, but it is also suitable for those who avoid gluten, allowing everyone to enjoy it.
3. Visually Appealing – The vibrant colors of the cake layers make for an eye-catching presentation for any celebration.
4. Easy to Make – With straightforward instructions, even novice bakers can master this recipe.
5. Adaptable Recipe – Feel free to add nuts or adjust the fillings according to your preference.
6. Perfect for Any Occasion – No matter the event, this cake is bound to be a showstopper, bringing joy to any gathering.
7. Delicious Leftovers – If there happens to be any leftover, it stores well and maintains its amazing flavors for days!
With all these delightful factors combined, it’s evident that this Easy Gluten-Free Hawaiian Dream Cake is a recipe you’ll want to keep at your fingertips.
Preparation and Cooking Time
Creating Easy Gluten-Free Hawaiian Dream Cake is a delightful journey that takes a bit of time but is well worth the effort. Here’s the breakdown of the time required for this tropical treat:
– Preparation Time: 30 minutes
– Cooking Time: 35-40 minutes
– Cooling Time: 30 minutes
– Total Time: Approximately 1 hour and 40 minutes
These times may vary based on your kitchen skills and equipment, so plan accordingly to ensure your cake comes out perfectly.
Ingredients
– 2 cups gluten-free all-purpose flour
– 1 ½ cups granulated sugar
– 1 cup unsweetened coconut milk
– 1 cup crushed pineapple (drained)
– ½ cup vegetable oil
– 4 large eggs
– 1 tablespoon baking powder
– ½ teaspoon salt
– 1 tablespoon vanilla extract
– 1 cup shredded coconut (unsweetened)
– Cream cheese frosting (for layering and icing)
– Maraschino cherries (for decoration)
Step-by-Step Instructions
Follow these easy steps to create the Easy Gluten-Free Hawaiian Dream Cake:
1. Preheat Oven: Begin by preheating your oven to 350°F (175°C). Prepare your cake pans by greasing and lining them with parchment paper.
2. Combine Dry Ingredients: In a large bowl, whisk together the gluten-free flour, baking powder, and salt until evenly mixed.
3. Mix Wet Ingredients: In another bowl, combine the vegetable oil, coconut milk, and granulated sugar. Whisk in the eggs and vanilla extract until smooth.
4. Combine Mixtures: Gradually stir the wet mixture into the dry ingredients, mixing until just combined. Be careful not to over-mix the batter.
5. Add Pineapple and Coconut: Gently fold in the crushed pineapple and shredded coconut, ensuring even distribution throughout the batter.
6. Pour Batter into Pans: Divide the batter evenly between the prepared cake pans, smoothing out the tops.
7. Bake the Cakes: Place the pans in the preheated oven and bake for 35-40 minutes. A toothpick inserted into the center should come out clean when done.
8. Cool the Cakes: Remove the cakes from the oven and let them cool in the pans for about 15 minutes. Then transfer them to wire racks to cool completely.
9. Prepare the Frosting: While the cakes cool, prepare your cream cheese frosting. Make sure it’s smooth and ready for application.
10. Assemble the Cake: Once completely cool, place one layer on a serving platter. Spread a layer of cream cheese frosting and then add the next layer. Continue this until all layers are stacked, frosting the top and sides.
11. Decorate: For a lovely finishing touch, top the cake with maraschino cherries and additional shredded coconut.
These simple steps will guide you in creating this impressive cake without hassle!
How to Serve
When it comes to enjoying Easy Gluten-Free Hawaiian Dream Cake, presentation and serving tips can make a world of difference:
1. Presentation: Display the cake on a decorative cake stand to enhance its visual appeal.
2. Serving Size: Cut generous slices, as everyone will want seconds of this delicious treat!
3. Accompaniments: Offer fresh fruit such as pineapple or strawberries alongside the cake for a vibrant touch.
4. Beverage Pairing: Complement this tropical delight with iced tea, coconut water, or a refreshing fruit smoothie.
5. Storage Tips: If there are leftovers, store the cake in an airtight container in the refrigerator to keep it fresh for several days.
By keeping these serving suggestions in mind, your Easy Gluten-Free Hawaiian Dream Cake will not only taste amazing, but it will also leave a memorable impression on your guests.
Additional Tips
– Use Ripe Pineapple: For optimal flavor, select fresh, ripe pineapples. They enhance the cake’s tropical essence and keep it juicy.
– Experiment with Coconut: Try using both sweetened and unsweetened shredded coconut for a delightful texture contrast.
– Chill the Cake: Allow the assembled cake to chill in the refrigerator for a couple of hours before serving. This helps the flavors meld beautifully.
– Consider a Cake Leveler: To achieve even layers, use a cake leveler or serrated knife to trim the tops of the cakes.
Recipe Variation
Feel free to customize your Easy Gluten-Free Hawaiian Dream Cake! Here are some fun variations to try:
1. Tropical Fruit Medley: Add layers of mango or passion fruit between your cake layers for a more varied tropical flavor.
2. Chocolate Twist: Add cocoa powder to the batter to create a chocolate version of the Hawaiian Dream Cake.
3. Cream Cheese Swirl: Combine softened cream cheese with the cake batter for a luscious and creamy texture that swirls beautifully throughout.
Freezing and Storage
– Storage: Keep the Easy Gluten-Free Hawaiian Dream Cake in an airtight container in the refrigerator. It can last for about 4-5 days while maintaining its delightful flavor and moistness.
– Freezing: You can freeze individual slices or the entire cake. For best results, wrap the cake tightly in plastic wrap before placing it in a freezer-safe container. It can be stored for up to 3 months.
Special Equipment
To ensure your Easy Gluten-Free Hawaiian Dream Cake turns out perfectly, you will need a few essential tools:
– Mixing bowls
– Electric mixer (or a whisk)
– Cake pans (9-inch round recommended)
– Parchment paper
– Offset spatula for frosting
– Wire rack for cooling
Frequently Asked Questions
How do I ensure the cake layers are even?
Using a kitchen scale to measure your batter can help create uniform layers. Alternatively, you can pour equal amounts of batter into each pan.
Can I substitute the eggs for a vegan option?
Yes, you can use a flaxseed meal or chia seed mixture as an egg replacer. Combine 1 tablespoon of ground flaxseed or chia seeds with 3 tablespoons of water and let it sit until it thickens, then mix it into the wet ingredients.
What can I use in place of vegetable oil?
You may substitute the vegetable oil with melted coconut oil for a deeper tropical flavor that complements the cake.
Does this cake need to be served immediately?
While the cake is delightful fresh, it can also be made a day ahead. Refrigerate it and enjoy it the next day for an even more integrated flavor profile.
Conclusion
The Easy Gluten-Free Hawaiian Dream Cake is not just a dessert; it’s a delightful tropical experience! With its soft, moist layers and creamy frosting, this cake is bound to become a favorite. It’s perfect for any occasion, allowing everyone to partake in its deliciousness, whether they have gluten sensitivities or not. Experiment with the variations and tips provided to make it uniquely yours, and enjoy the tastes of paradise with each bite!

Easy Gluten-Free Hawaiian Dream Cake: An Incredible 7-Layer Recipe
- Total Time: 18 minute
Ingredients
– 2 cups gluten-free all-purpose flour
– 1 ½ cups granulated sugar
– 1 cup unsweetened coconut milk
– 1 cup crushed pineapple (drained)
– ½ cup vegetable oil
– 4 large eggs
– 1 tablespoon baking powder
– ½ teaspoon salt
– 1 tablespoon vanilla extract
– 1 cup shredded coconut (unsweetened)
– Cream cheese frosting (for layering and icing)
– Maraschino cherries (for decoration)
Instructions
Follow these easy steps to create the Easy Gluten-Free Hawaiian Dream Cake:
1. Preheat Oven: Begin by preheating your oven to 350°F (175°C). Prepare your cake pans by greasing and lining them with parchment paper.
2. Combine Dry Ingredients: In a large bowl, whisk together the gluten-free flour, baking powder, and salt until evenly mixed.
3. Mix Wet Ingredients: In another bowl, combine the vegetable oil, coconut milk, and granulated sugar. Whisk in the eggs and vanilla extract until smooth.
4. Combine Mixtures: Gradually stir the wet mixture into the dry ingredients, mixing until just combined. Be careful not to over-mix the batter.
5. Add Pineapple and Coconut: Gently fold in the crushed pineapple and shredded coconut, ensuring even distribution throughout the batter.
6. Pour Batter into Pans: Divide the batter evenly between the prepared cake pans, smoothing out the tops.
7. Bake the Cakes: Place the pans in the preheated oven and bake for 35-40 minutes. A toothpick inserted into the center should come out clean when done.
8. Cool the Cakes: Remove the cakes from the oven and let them cool in the pans for about 15 minutes. Then transfer them to wire racks to cool completely.
9. Prepare the Frosting: While the cakes cool, prepare your cream cheese frosting. Make sure it’s smooth and ready for application.
10. Assemble the Cake: Once completely cool, place one layer on a serving platter. Spread a layer of cream cheese frosting and then add the next layer. Continue this until all layers are stacked, frosting the top and sides.
11. Decorate: For a lovely finishing touch, top the cake with maraschino cherries and additional shredded coconut.
These simple steps will guide you in creating this impressive cake without hassle!
- Prep Time: 30 minutes
- Cook Time: 35-40 minutes
Nutrition
- Serving Size: 12 slices
- Calories: 370 kcal
- Fat: 18g
- Protein: 4g


