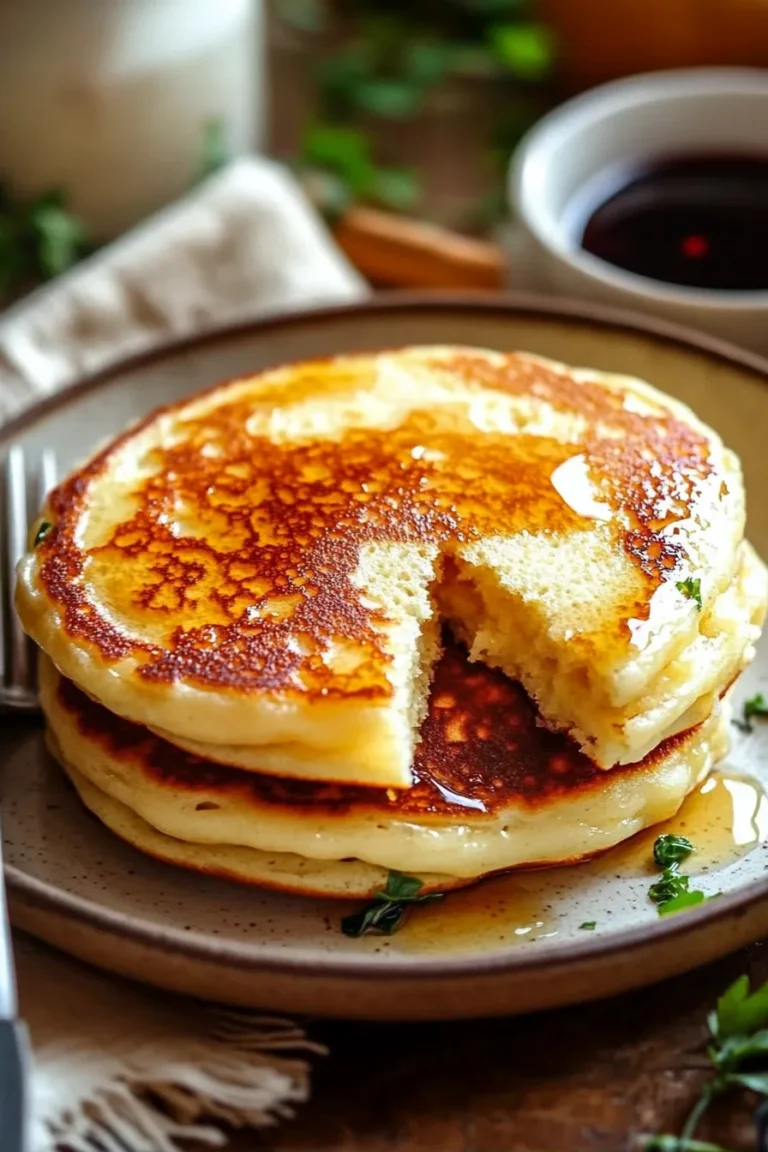
Gluten-Free Pancakes are an amazing way to start your day on the right note. Whether you’re gluten-sensitive, following a specific diet, or simply want to try something new, these pancakes offer a delicious alternative to traditional recipes. Light, fluffy, and incredibly satisfying, gluten-free pancakes can turn a mundane breakfast into a wonderful experience. Imagine waking up to a stack of warm pancakes topped with fresh fruits and maple syrup. Isn’t that a mouth-watering thought?
If you’ve ever been frustrated by dry, dense gluten-free pancake recipes, you are in for a treat. This recipe balances flavors, textures, and nutrition, making your morning meal something you won’t soon forget. Not only are these pancakes kind to your taste buds, but they also take very little time to whip up. Get ready to discover how simple it is to create a breakfast that everyone will love, regardless of their dietary preferences.
Making gluten-free pancakes can feel like a daunting task, but it doesn’t have to be! The ingredients are straightforward, and the process is intuitive. In this comprehensive guide, we will explore the reasons you’ll adore this recipe, preparation time, necessary ingredients, and easy-to-follow steps. You will also learn the best serving suggestions to wow your family and friends. With Gluten-Free Pancakes on your menu, breakfast is about to get a whole lot more exciting!
Why You’ll Love This Recipe
There are several reasons this gluten-free pancakes recipe has gained popularity and admiration among cooks and food enthusiasts. Here are key highlights of why you will absolutely love making this recipe:
1. Quick and Easy: This recipe can be prepared in under 30 minutes, making it perfect for busy mornings.
2. Fluffy Texture: The combination of gluten-free flours ensures a light and fluffy pancake that resembles traditional ones.
3. Customizable: You can easily adapt this recipe by adding your favorite ingredients, from fruits to chocolate chips.
4. Nutritious: Utilizing wholesome ingredients makes these pancakes more nutritious than regular ones.
5. Family-Friendly: This recipe is great for everyone, including kids who are picky eaters. They’ll love the taste!
6. Meal Prep Friendly: You can prepare the batter in advance or freeze the pancakes for later, saving time during the week.
These features make this gluten-free pancake recipe not only practical but deeply satisfying. Each bite is wholesome, providing energy and joy at the start of your day.
Preparation and Cooking Time
Now that you’re excited about these amazing gluten-free pancakes, let’s talk about the time required to make them. Here’s an estimate to help you plan your cooking session effectively:
– Preparation Time: 10 minutes
– Cooking Time: 15-20 minutes
– Total Time: Approximately 25-30 minutes
Keep in mind that these times may vary based on your cooking skills and kitchen setup. However, this framework ensures you’ll have enough time to enjoy your delicious breakfast.
Ingredients
– 1 cup gluten-free all-purpose flour
– 1 tablespoon sugar (optional)
– 1 tablespoon baking powder
– ¼ teaspoon salt
– 1 cup milk (or non-dairy alternative)
– 1 large egg
– 2 tablespoons melted butter or coconut oil
– 1 teaspoon vanilla extract
– Optional toppings: fresh berries, banana slices, maple syrup, or nuts
Step-by-Step Instructions
Creating delicious gluten-free pancakes is simple and enjoyable. Follow these easy steps to achieve pancake perfection:
1. Combine Dry Ingredients: In a large mixing bowl, whisk together the gluten-free flour, sugar, baking powder, and salt until well combined.
2. Mix Wet Ingredients: In a separate bowl, whisk the milk, egg, melted butter, and vanilla extract. Make sure the mixture is smooth and well blended.
3. Combine Wet and Dry Mixtures: Pour the wet ingredients into the dry ingredients. Stir gently until just combined. Avoid over-mixing; a few lumps are okay!
4. Preheat Your Pan: Heat a non-stick skillet or griddle over medium heat and lightly grease it with a small amount of oil or butter.
5. Pour the Batter: Use a measuring cup or ladle to pour about ¼ cup of batter onto the skillet for each pancake.
6. Cook Until Bubbles Form: Cook for about 2-3 minutes until bubbles start to form on the surface. The edges should look set and dry.
7. Flip the Pancake: Carefully flip the pancake using a spatula, and cook the other side for another 1-2 minutes until golden brown.
8. Repeat: Continue until all the batter is used, adjusting the heat as necessary to prevent burning.
9. Serve Warm: Transfer the pancakes to a warm plate, and cover them with a cloth to keep them warm while you finish cooking the rest.
These steps will guide you through the entire process, leaving you with a stack of fluffy gluten-free pancakes ready to be enjoyed!
How to Serve
Serving gluten-free pancakes can be just as fun as making them! Here are some delightful ideas for making your meal memorable:
1. Stack Them High: Create an appealing presentation by stacking the pancakes in groups of three or four on a decorative plate.
2. Add Toppings: Drizzle with warm maple syrup for sweetness, or add fresh berries on top for a burst of color and flavor. Banana slices are a great addition too!
3. Get Creative: Sprinkle with powdered sugar or add whipped cream for an extra indulgent breakfast. You can even serve them with nuts for added crunch.
4. Pair with Beverages: Consider serving your pancakes with a side of fresh orange juice or your favorite breakfast beverage like coffee or tea.
5. Make It a Meal: Turn your pancakes into a full meal by serving with scrambled eggs or bacon on the side for a balanced breakfast.
By focusing on serving methods, you create a breakfast that is not just nourishing but visually attractive and enjoyable for everyone at the table. These simple yet effective serving tips will enhance your gluten-free pancake experience and make it a morning to remember!
Additional Tips
– Use Fresh Ingredients: For the best results, make sure your ingredients are fresh, especially the baking powder, as this affects the fluffiness of your gluten-free pancakes.
– Let the Batter Rest: Allow the batter to sit for about 5 minutes before cooking. This gives the gluten-free flours time to absorb the liquid, leading to better texture.
– Try Different Flours: Experiment with different gluten-free flours such as almond flour or oat flour for a unique taste and texture.
– Adjust Cooking Temperature: If your pancakes are cooking too quickly, adjust the heat. Cooking on medium-low heat allows them to cook through without burning.
– Don’t Skip the Toppings: Enhance your pancakes by using a variety of toppings, from yogurt and honey to nut butter, providing both flavor and nutrition.
Recipe Variation
There are countless ways to make your gluten-free pancakes exciting! Consider these variations:
1. Blueberry Pancakes: Fold in a cup of fresh or frozen blueberries into the batter for a fruity twist.
2. Chocolate Chip Pancakes: Add a half cup of gluten-free chocolate chips to the batter for a sweet treat.
3. Cinnamon Swirl Pancakes: Swirl some cinnamon and sugar mix into the batter before cooking for a delightful flavor.
4. Savory Pancakes: Add chopped spinach, cheese, and herbs for a savory twist that can be enjoyed for lunch or dinner.
Freezing and Storage
– Storage: Keep your gluten-free pancakes in an airtight container in the fridge. They will stay fresh for 3-4 days.
– Freezing: Cool the pancakes completely before freezing. Layer them with parchment paper and place them in a freezer-safe bag. They can be frozen for up to 2 months. Reheat in the microwave or toaster oven for a quick breakfast.
Special Equipment
To make these gluten-free pancakes effectively, you’ll want to consider having the following tools handy:
– Mixing bowls for blending ingredients
– Whisk for combining dry and wet ingredients
– Non-stick skillet or griddle for cooking the pancakes
– Measuring cups and spoons for accurate ingredient measurement
– Spatula for flipping pancakes
Frequently Asked Questions
Can I make these pancakes vegan?
Yes, substitute the egg with a flaxseed meal or applesauce, and use a non-dairy milk like almond or oat milk.
What if my pancakes turn out too dense?
To avoid dense pancakes, ensure your baking powder is fresh and don’t over-mix the batter. Some lumps are fine.
Can I use store-bought gluten-free flour blends?
Absolutely! Many gluten-free flour blends work well. Just make sure they include xanthan gum, or add a bit yourself for better texture.
How do I reheat leftover pancakes?
Reheat pancakes in the microwave for about 20-30 seconds, or place them in a toaster for a crispy finish.
Are these pancakes gluten-free?
Yes! This recipe is specifically designed to be gluten-free, using gluten-free flours and ingredients.
Conclusion
These gluten-free pancakes are not just delicious; they are a breakfast game-changer! With their light and fluffy texture, versatile toppings, and ease of preparation, everyone at your table will be asking for seconds. Whether you make them for a weekend brunch, a busy weekday breakfast, or a family gathering, these pancakes are sure to delight. So gather your ingredients, prepare your skillet, and get ready to indulge in the best gluten-free pancake experience.
Gluten-Free Pancakes: An Incredible Ultimate Recipe for Everyone
- Total Time: 36 minute
Ingredients
– 1 cup gluten-free all-purpose flour
– 1 tablespoon sugar (optional)
– 1 tablespoon baking powder
– ¼ teaspoon salt
– 1 cup milk (or non-dairy alternative)
– 1 large egg
– 2 tablespoons melted butter or coconut oil
– 1 teaspoon vanilla extract
– Optional toppings: fresh berries, banana slices, maple syrup, or nuts
Instructions
Creating delicious gluten-free pancakes is simple and enjoyable. Follow these easy steps to achieve pancake perfection:
1. Combine Dry Ingredients: In a large mixing bowl, whisk together the gluten-free flour, sugar, baking powder, and salt until well combined.
2. Mix Wet Ingredients: In a separate bowl, whisk the milk, egg, melted butter, and vanilla extract. Make sure the mixture is smooth and well blended.
3. Combine Wet and Dry Mixtures: Pour the wet ingredients into the dry ingredients. Stir gently until just combined. Avoid over-mixing; a few lumps are okay!
4. Preheat Your Pan: Heat a non-stick skillet or griddle over medium heat and lightly grease it with a small amount of oil or butter.
5. Pour the Batter: Use a measuring cup or ladle to pour about ¼ cup of batter onto the skillet for each pancake.
6. Cook Until Bubbles Form: Cook for about 2-3 minutes until bubbles start to form on the surface. The edges should look set and dry.
7. Flip the Pancake: Carefully flip the pancake using a spatula, and cook the other side for another 1-2 minutes until golden brown.
8. Repeat: Continue until all the batter is used, adjusting the heat as necessary to prevent burning.
9. Serve Warm: Transfer the pancakes to a warm plate, and cover them with a cloth to keep them warm while you finish cooking the rest.
These steps will guide you through the entire process, leaving you with a stack of fluffy gluten-free pancakes ready to be enjoyed!
- Prep Time: 15 minutes
- Cook Time: 15-20 minutes
Nutrition
- Serving Size: 4 pancakes
- Calories: 220 kcal
- Fat: 10g
- Protein: 5g